So here’s how our Halloween costume choice came about, here is the boys letterman cardigan tutorial and now onto the Poodle-skirt tutorial! It’s actually a pretty simple costume to make.
First you’ll want to figure out the waist size your working with. We want to figure out the radius. My daughter’s waist was 19 inches. Divide it by Pi (19/3.14=6.05) and you get the diameter. Divide that in half to get the radius (6.05/2=3.02). Just so you know it’s better to go a little to small rather than to large in this case, you can always cut a larger hole, but once it’s cut you can’t go smaller. Get some felt in whatever color you’d like. My felt is 72 inches wide so it’s wide enough to make an adult skirt as well. So start by folding your felt in half.
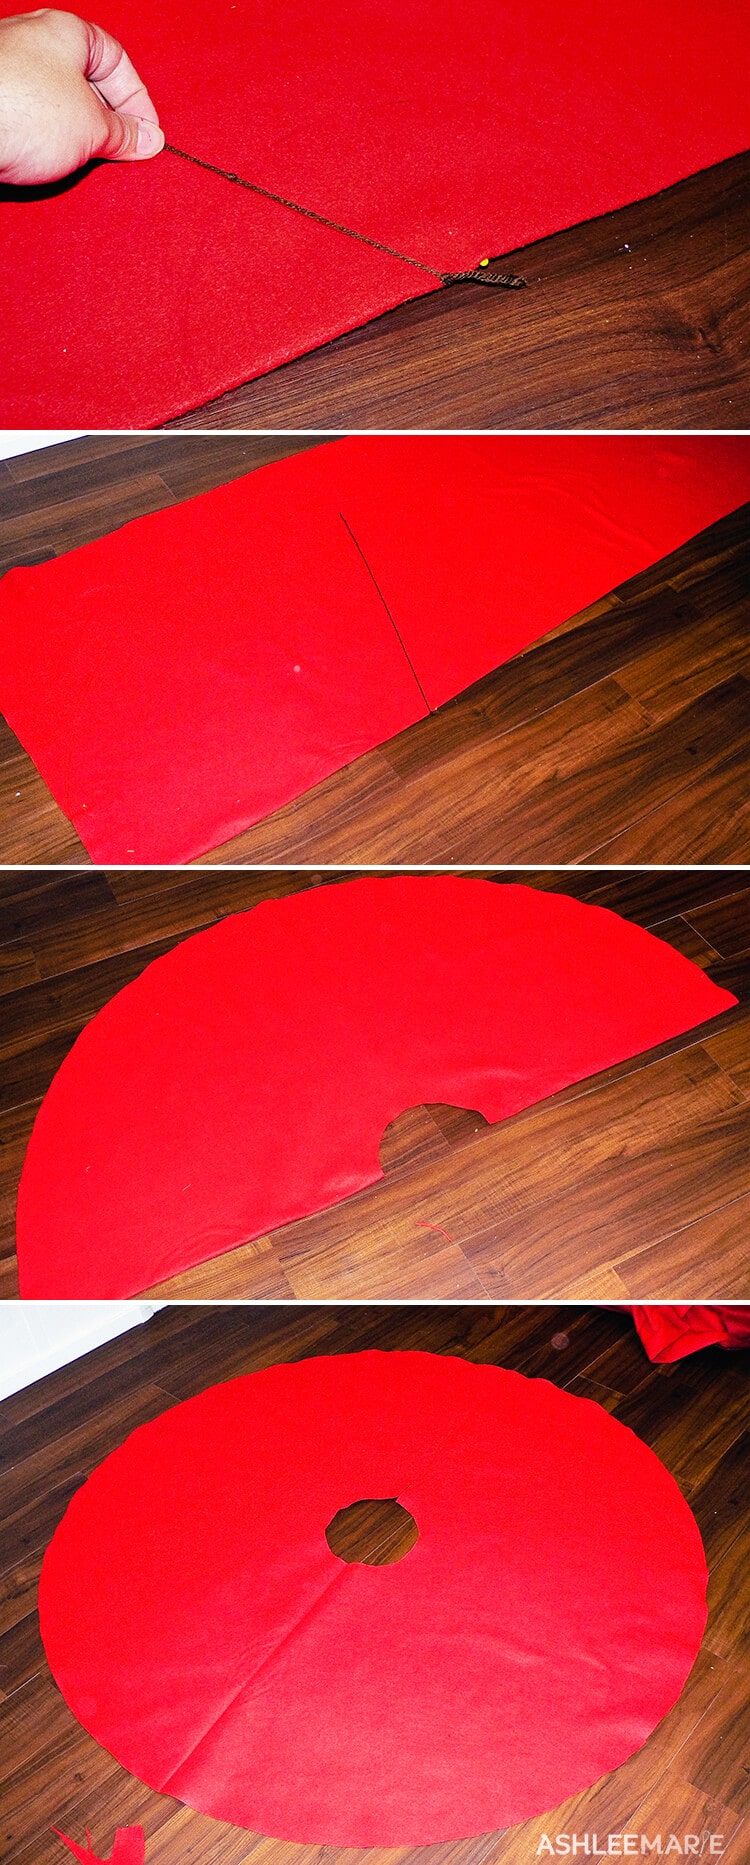
The easiest way to mark the waist is to take a string, pin the end to the FOLDED half of your felt. Measure to your radius length, mine is 3 inches. Not take a pen and while pulling your string away from the center take it and mark a half circle from fold to fold. Now you have your half circle for the waist! STOP, don’t cut yet, we still have to use our center pin first.
For this we need the length of the skirt you want. Let’s use mine again, 16 inches. Add to it our radius (16+3=19) and we have our new length. So use the same technique as before, measuring out a string and mark our half circle! NOW you can cut!
And we have the body of our skirt! We’ll need to try it on to make sure the waist is the right size. Since you can’t get it over our hips this way we need to cut a slit down one side. But not too large. Also felt can stretch and we don’t want that so be careful.
Once you have tried it and know your waist and slit are right it’s time to add a waist band. You can use just felt, but remember that felt can get stretched. So what I did to strengthen it was to use adhesive interfacing. I measured out the waist for the waistband. You can go the exact length or go a little longer. I did both for comparison. You’ll also want to double the height that you want. Cut the interfacing to the same length, but half the height. Iron on the first side of the interfacing, peel off the backing, fold it over and and iron it again!
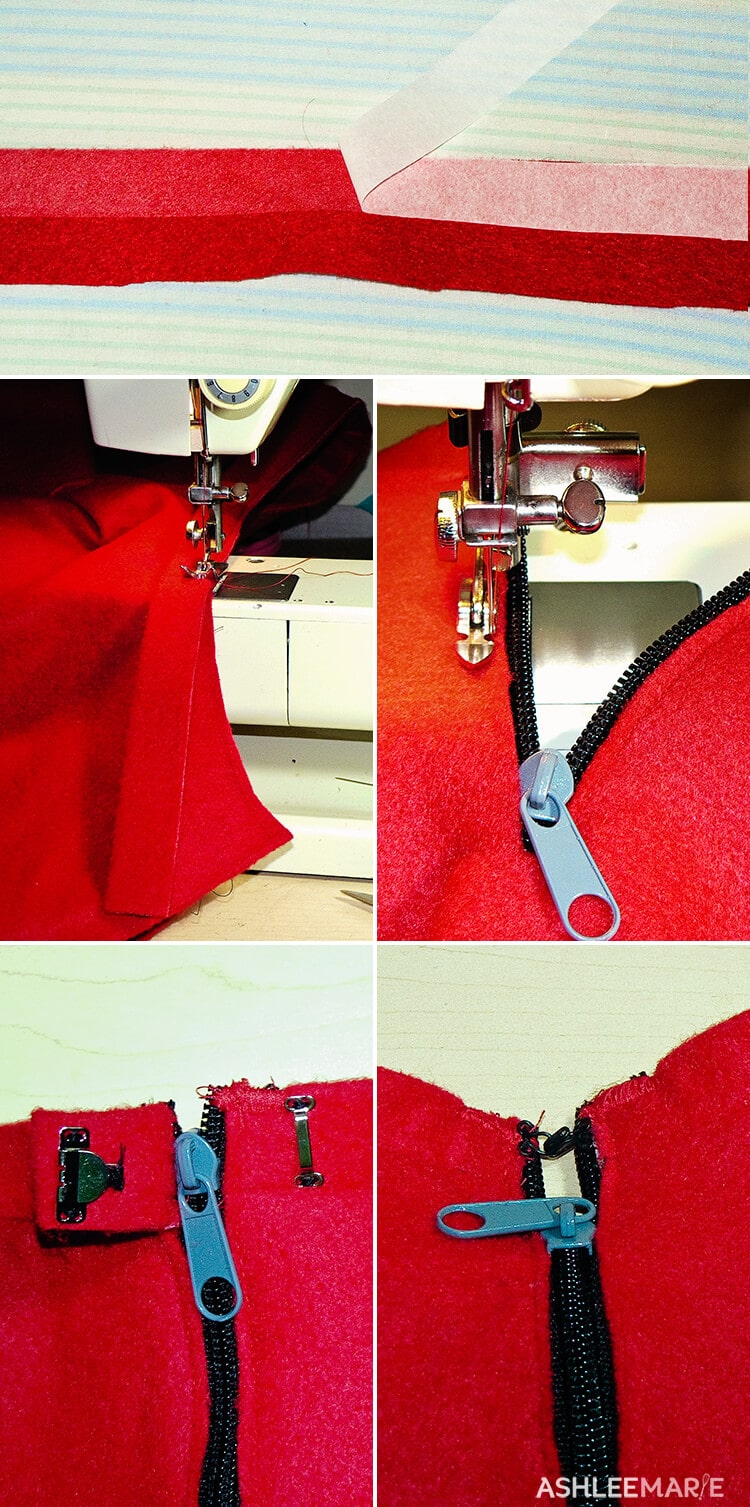
Now it’s time to sew the waistband onto the top of the skirt. Pin the right sides together and sew! Easy peasy!
Now you have a decision to make. How you want to close your skirt, you can go with a simple button, works great, a hook and eye, or a zipper. I’d had poodle skirt costumes growing up so I know how easy it is to stretch out the slit so I decided to go with a zipper. PLUS I have lots of zippers around my house! Now it would be easier to go with a zipper that’s already the right length or at least has an end! But since my zippers are all continuous I had to cut and make “ends” for my own. It makes mine look a little messier than your’s will be! Use a zipper foot and sew it in!
Now it COULD be finished, but it depends on your zipper. I tried my daughters on her and the zipper is so smooth it kept slipping down! SO I added a hook and eye.
If I had known I was going to be adding a hook and eye I wouldn’t have sewn the zipper all the way up. Also while the hook and eye works my favorite of my skirts was mine where I had overhang and used a sew on hook with eye closures. And this way it covers up the zipper.
Now comes the fun part! Choosing your image! There is always the classics, poodle or Scotty dog, etc… But I decided to go with something more personal to us! A pig! In case you didn’t know we have a pet micro mini Potbellied Pig, that and I’ve collected pigs since I was a baby! So pig it was! I again used the double sided adhesive interfacing for this. First I pinned my image onto black felt AND the interfacing, now cut it out!
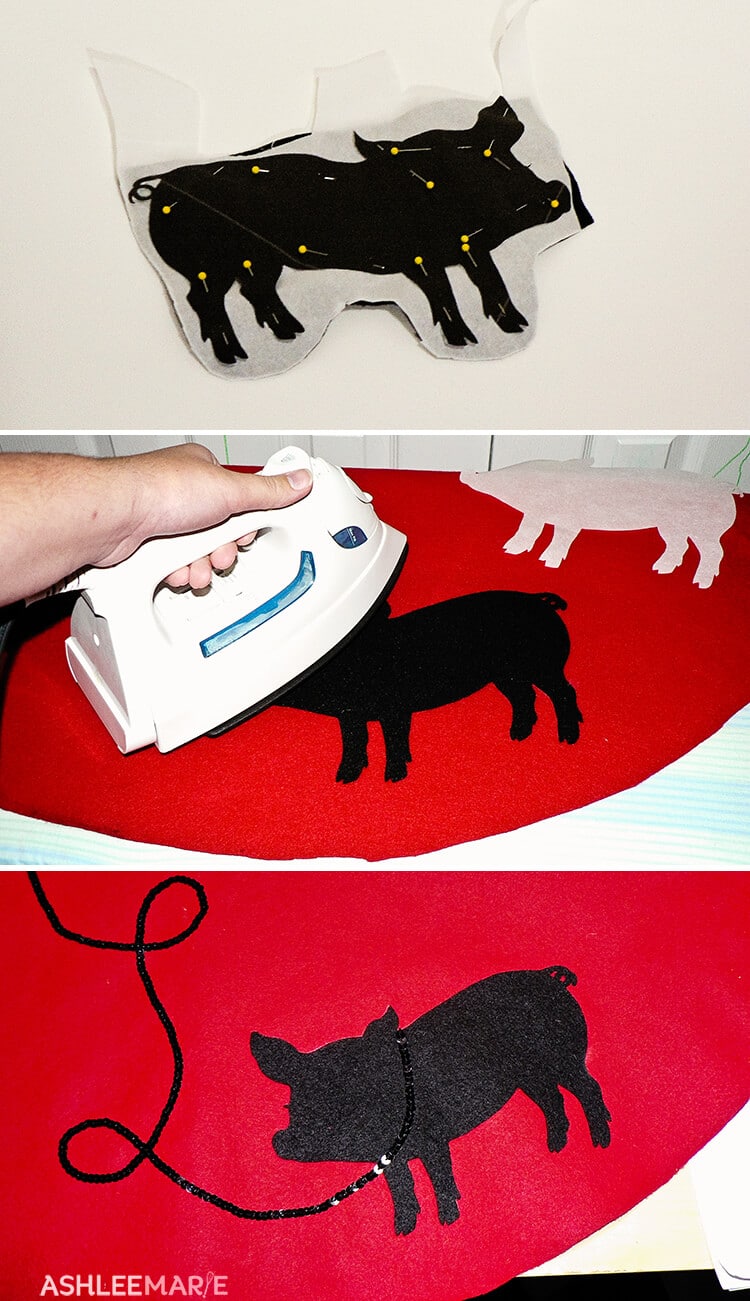
Now follow your interfacing directions. For mine I first ironed the interfacing onto the skirt. Let it cool. Then peel off the backing, place the felt on top and iron it again!
And now for the bling! Our pig needs a leash! You can go any route you want for your leash. You can add collars, beaded eye’s? Anything you want. I went with a sequined ribbon! I THOUGHT I’d be able to sew it on, but my longest stitch was still to short to hit the holes perfectly, also that wouldn’t have been precise enough. SO I hand stitched it on. On all three dresses. It ended up taking 3 nights! So DON’T go this way if you are in a hurry! But I love the way it looks so it’s okay, AND I emptied out my HULU queue while working on it.
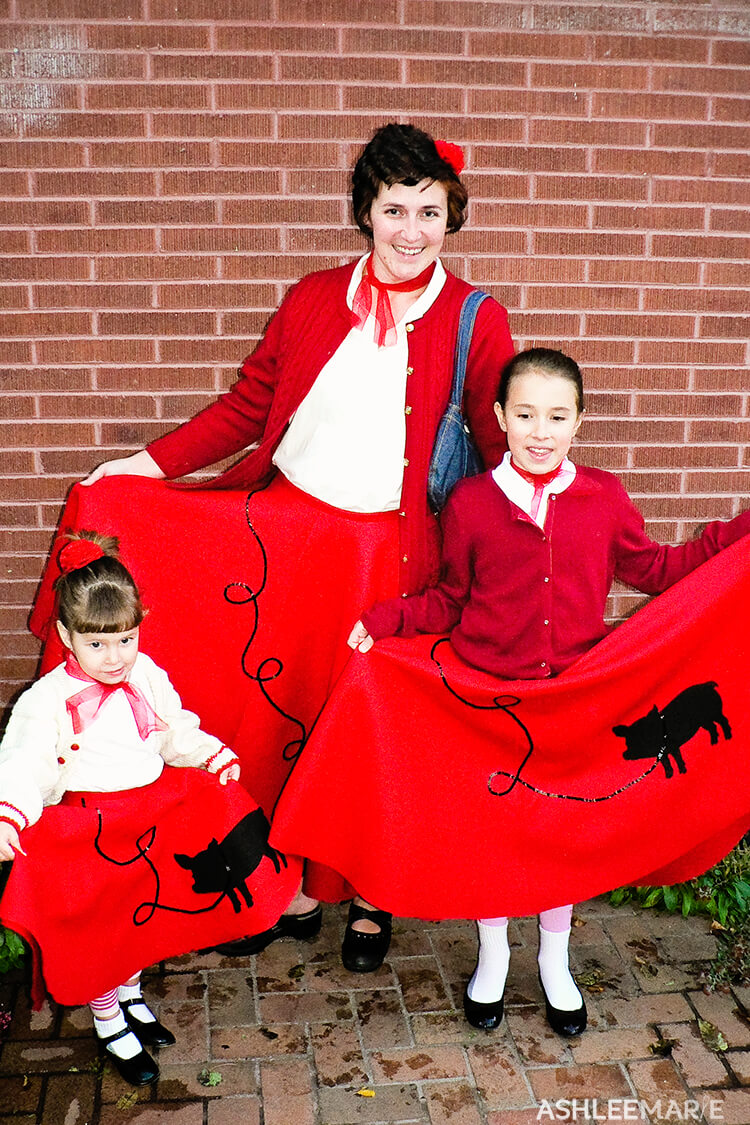
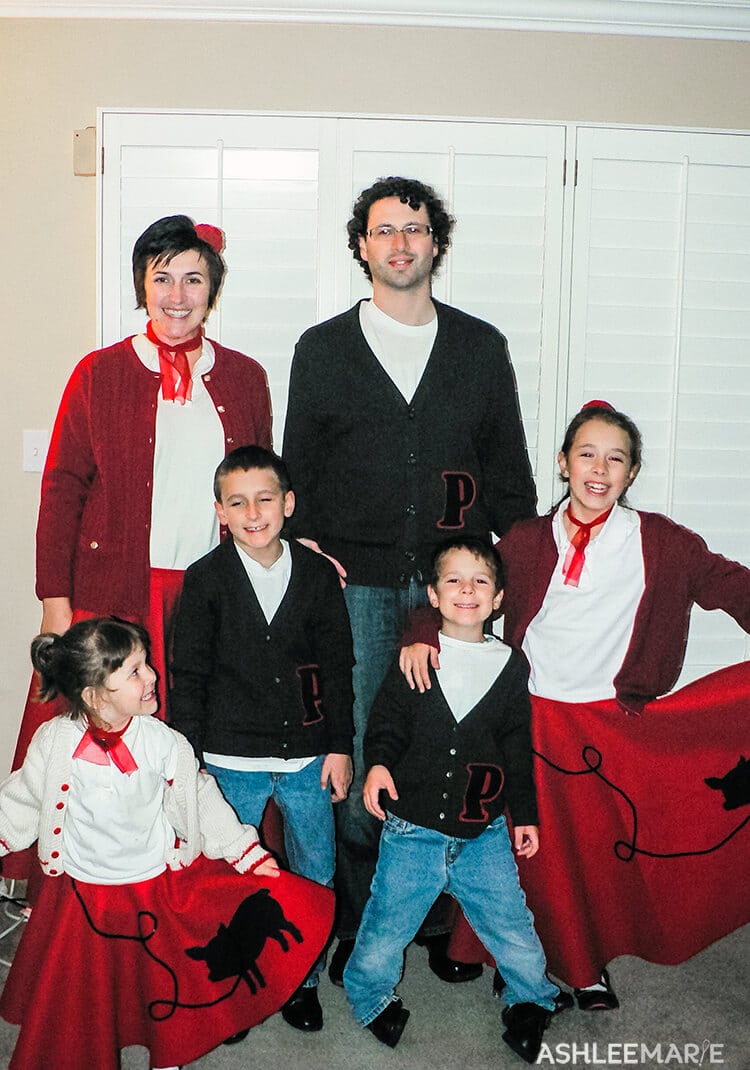
And all three finished and on! We went with the classic ponytails for the girls and I made us all felt ruffled flowers, tulle neck tie, white collared shirt, white bobby socks, black shoes (I could only find zebra ked’s, but white ked’s would have been better) and cardigans. Complete package! Don’t forget to check out my boy’s outfits!


, Swami Swan and Humming Fish")


Allie
You guys looks SO cute! Excellent job!
Ashlee
Thank you! It was really fun to do! The boys looked pretty handsome too, but the poodle skirts are just adorable!
Angela
Love it!
Ashlee
Thank you! I love halloween
Mindy
So cute! I’ll be going to a 60s event tonight, but I sort of wish I could have pulled together a poodle skirt with the cute scarf in the hair for 50s instead!
Ashlee
Poodle skirts are pretty easy to pull together. 60’s, huh? That could be really fun too! Hope you have a good time!
Stephanie Lynn
Ashlee, Fabulous! I love your entire theme for this year! Fantastic job! Thanks so much for linking to The Sunday Showcase party – I greatly appreciate it. I have featured both in my first round of showcases. Hope you are enjoying your week! ~ Stephanie Lynn
Ashlee
I saw that! Thank you. They were super fun to make. I think I’ll start working earlier next year though. It was way to stressfull doing it all in 4 days!
Lorie
So very cute! They do a sock hop at my kids school every year and this would be perfect!
I just realized that I completely missed your cute skirt when I was posting costumes from Show and Tell Saturday! I am such a goob!
Ashlee
no biggie! I’m not sure I had it up in time anyway! They are super fun to make. Esp the fact that you can completely personalize them by what image you add to the skirt!
someday crafts
Love your costumes, Ashley! Too CUTE
Ashlee
Thanks! It was really fun, I love family themes!
Linda
Love your Poodle Skirts! They are darling. I want to make one for myself for Halloween, your tutorial is great! Thank you.
Ashlee
Thanks so much! They are super easy too! Let me know if you end up making one (or more!)
angie
Awesome! My 3 girls and I have found our costumes for this Halloween! 🙂 Ages 13, 12 and 2. Can’t wait to start making them! On another note….my head started spinning and my heart started to beat like crazy when I got to the part about your family owning a micro mini pot-bellied piggie! My dream pet! I love them with all my heart! I too, have been collecting pig items for a long time and we’ve been waiting to search for a real one until after we moved into our “bigger and better” home/yard. Now that we’re here, we are ready to start looking! Please..when you get a minute, could you email me and fill me in on how you went about getting yours and where? Any kind of info you could give me would be much appreciated and I thank you so much! (angie_merkle@Yahoo.com) *the y is also lower case but I’ve gone back 3 times to fix it and it just keeps going back to capital.
Ashlee
I’m glad you like my poodle skirts! They were super fun to make. The bad news is we had to put our pig down. Regular potbelly pigs get up to 300 pounds, mini ones around 150 and micro mini’s around 30 and the so called teacup pigs around 15… the price goes up based on what kind you get. since we live in a basement apartment and in an area that snows half the year we needed to get a super tiny one, but couldn’t afford teacup, so we went with the micro mini. his parents were 30 and 20 lbs so we were hoping he’d stay around 25 lbs. Well he got big, really big, so big we couldn’t keep him inside, and he got violent, biting our son so he needed stitches. At 18 months he was over 100 lbs and not fully grown and we had a new baby on the way, so we tired to find a local place to take him, and when no one would/could we had to put him down. My husband thinks the mini, micro mini and teacup pigs are all scams for more money, but I don’t know for sure, but I certainly wouldn’t recommend where we got ours. Also I’d only get another one if I had a large yard and lived someplace warm enough to keep the pig outside year round.
Rachel
I was wondering if the same thing applies to this dress if I do not add a zipper. I’m very new on the sewing scene. I’m talking 3 months new. I haven’t tackled any zippers yet. I was going for the whole 50’s look for my girls and I. When I saw the letterman sweaters I made it a family thing and we will take pictures and maybe wear them for halloween as well. Does the 72 in felt would it still work without the zipper. I just want to make a donut and add an elastic waist band, Maybe. I’m still undecided.
Ashlee
elastic won’t work with the felt, you don’t want to ruffle it at all. for a less permanent skirt just cut a slit like my zipper so you can fit it over your hips. The button will keep it closed, but wear something underneath!
Rachel
Thank you for your reply. I tried your tutorial. I’m not sure what I’m doing wrong. Exactly what size is your felt, 72xwhat? I got mine from Joann and it is 72×36. Should I have gotten 2 yards instead? My front and back pieces are very nice, however the sides seem very very short. I followed your tutorial. You say 72 was enough for you and also the kids. Is that one yard each or two yards whichever it is what exactly are the measurements. 72 by what? Sorry for being so redundant. I’m a little frustrated now that I have played with 3 separate yards of felt. One came out right for my daughter because I folded so that it was 42×42 and then folded it again so that it was 21×21 cut across from bottom edge to the other one and then cut the top 4 inches to get a 20 in waist…. it came out really nice. Help me please. Thank you very much
Ashlee
I honestly don’t remember, it was years ago! high quality felt vs low quality felt makes a difference. like I said in the tutorial I folded the felt in half. take a string the length you want your skirt. Pin one end to the folded side, tie the other end around a pen, pull the string tight (not yarn, it stretches) and mark starting at one fold to the other in a half circle, do the same thing for the hole (about 3 inch, radius for a 6 inch diameter hole). If you do that there is no way it could be uneven. I’m not quite sure what your doing different from me. I started with the big skirt and then went on from there and had plenty of fabric with extra. sorry I can’t be more help.. It’s the same way everyone I know makes one, my mom, friends etc…
Jennifer
Thank you Ashlee for the tutorial. I was making a couple of adult skirts for Halloween at my work. I did end up having trouble with the waist being too big both times and ended up using elastic for the waistband. The elastic actually looked fine. I really don’t know why the waist circle came out too big with your formula (5.75 for a 36″ waist), I even tried going almost an inch smaller the second time and it was still too big. But no problem, I created a casing at the waist for the elastic and was done in less than an hour. For a one day affair, that was fine and looked good.
Ashlee
interesting. I wonder if the more expensive felt I used helped keep it from stretching as I cut the waist? Glad it worked out for you!
Carolyn
Love the piglet. Can you share your image or source for the image please?
Ashlee
I did a google image search and found this one http://i.istockimg.com/file_thumbview_approve/1084942/2/stock-illustration-1084942-pig-silhouette-and-shadow.jpg I printed it off and used it as a pattern!