Here’s my 5th pillow from my SYTYC Thrift store challenge. I have to say this is one of my favorites!!! I love denim, I love working with it, and I tend first think of denim as a medium when I’m starting a project. I don’t always MAKE everything out of denim, but I do think of it first. I especially like working with twin needles and denim, making whatever I’m sewing look more like jeans.
The funny thing is? I hate blue. I really don’t like blue AT ALL. There is NO blue in my house anywhere, but I do love denim, so even though the color doesn’t match the rest of the room, denim always works! Also my large family pictures hanging on the wall we’re wearing denim, so I guess there IS a bit of blue in the room…
Initially I had an old denim dress I found at the thrift store I was planning on using, but then I found this old denim fabric at one store!!! TREASURE! And now I can save the dress to try to do something else with.
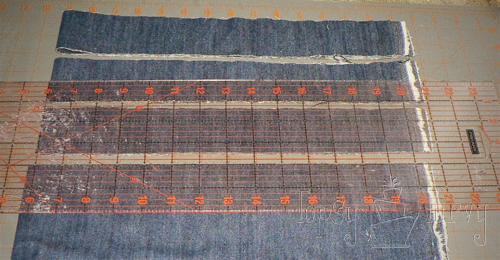
First I cut out the fabric for the front of the pillow, a nice rectangle. Then I cute 2 inch strips. I folded back 1/4 inch and ironed it of every strip.
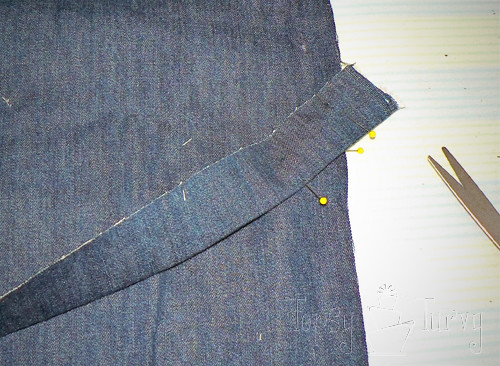
Then I found the center of my rectangle and started laying down my ironed strips.
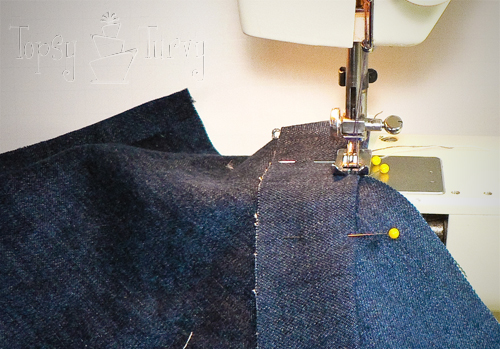
Using my twin needles and denim thread I sewed right over the folded edge down to the center. I started at the outside and worked my way just past the center. Then I cut the strip. This way I didn’t have to pre measure every strip.
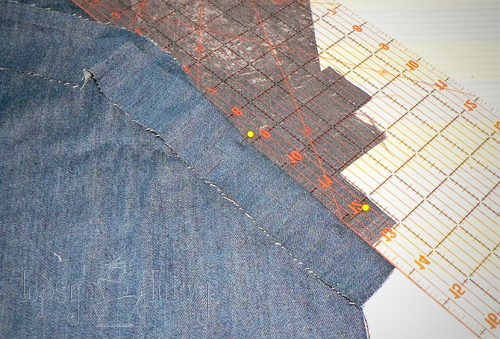
Using my guide I measured 1 inch between each row, going back and forth from one side to the other creating a herringbone effect.

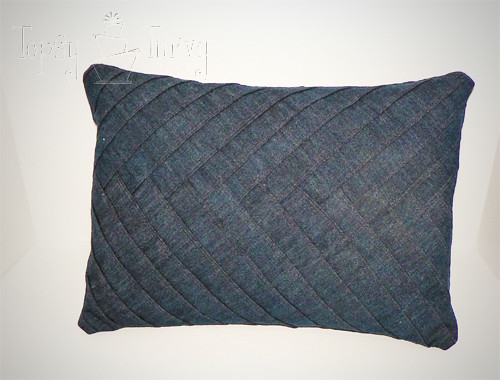
Here is the front finished…
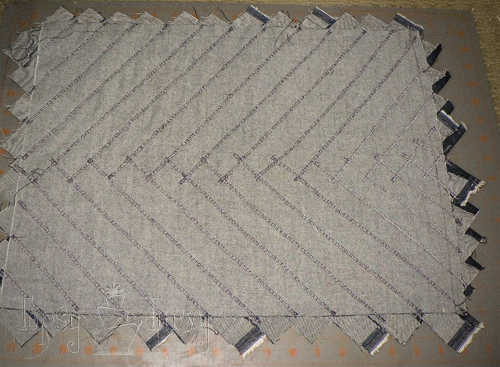
And the underside!!! I cut the rectangle back, getting rid of all the edges…
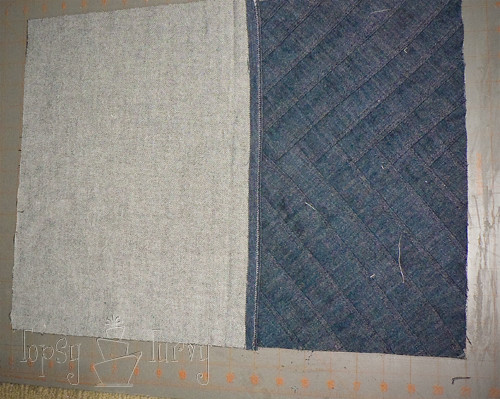
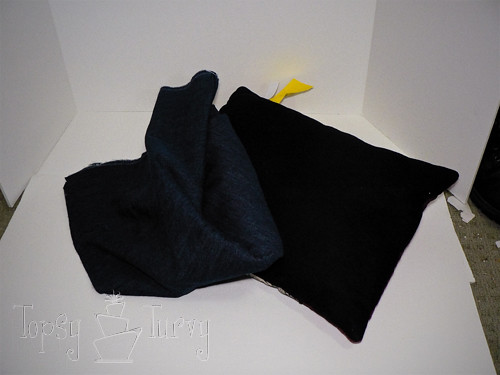
Then, right sides facing each other I added the back pieces for an envelope closure. I had previously folded back the edge of each envelope side, ironed it and sewn it with the same twin needles as the front. Fold it right side out and SHOVE the pillow into the case!!!
All finished!
Don’t forget to check out the tutorials for the other pillows
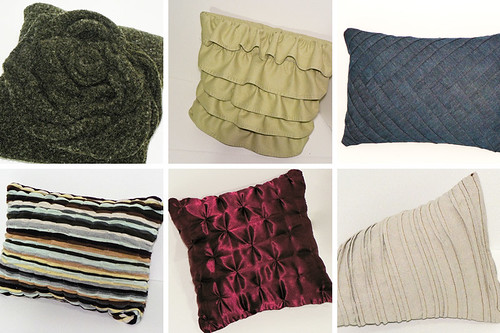
2. elastic gathered sweater pillow
6. drop cloth pleated triangle pillow


Shelley Smith
I LOVE this pillow! Such a cool design and idea 🙂
Thanks for the tutorial!
I’m going to facebook and tweet this 🙂
~Shelley
Ashlee
Thank you again, Shelley, for linking this up to your facebook!!! It made my day to get online and see it. I’m so glad you liked it!! I am a little too in love with denim, but try not to overdo it!
Madigan at madiganmade
What beautiful detail! Love the texture of the herringbone pattern.
Ashlee
Thanks! I love denim, it’s one of my favorite mediums! And the herringbone is super fun! Everyone who comes over loves it!
Cathy
Awesome! That gives me a great idea of what to do with the pair of jeans my son just ripped a big whole in. 🙂 Thanks!
Love it!
Ashlee
Yeah!!! My son’s and husband seem to rip jeans weekly! It’s insane, but since I love working with denim I always have material for projects!