For basic pan preparation you want to cute a circle of parchment for the bottom of your pan. Check out my way to get a perfectly sized circle for your pans (the outside of a pan isn’t always the best way to go – it’s usually too big)
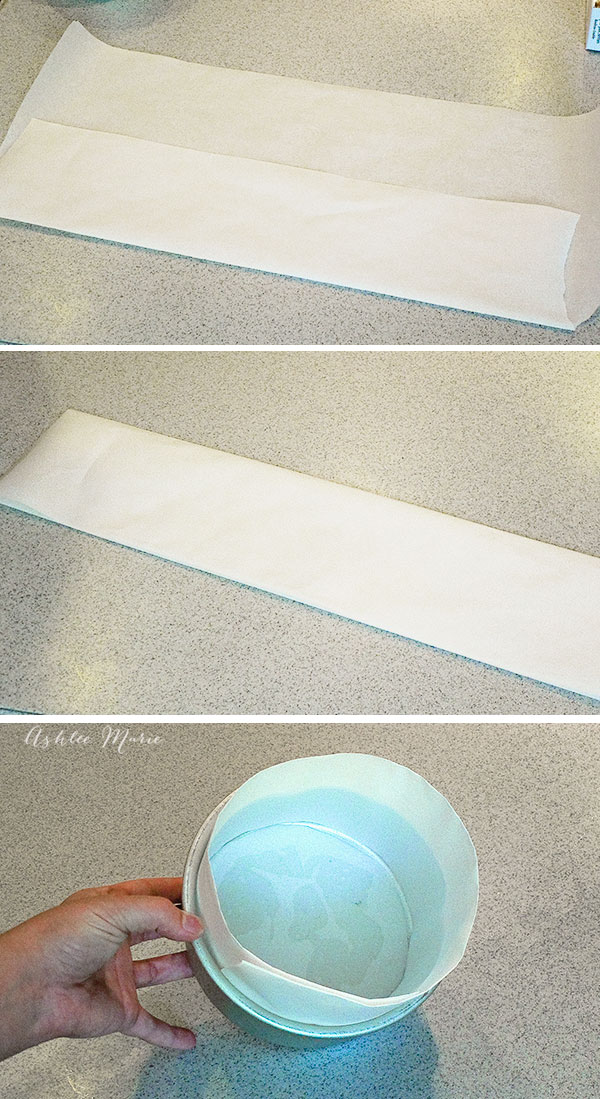
If want to bake cakes taller than the pans you have (like I do for cake carving) I also add reinforced parchment paper to the outsides. you start with pulling out a long strip of parchment paper, long enough to wrap around the cake pan.
Then I fold it into thirds, fold up the bottom. Then fold down the top. To prepare it for the pan, I curl it. Then put it into the pan and let it uncurl. I spray a bit of PAM onto the bottom corners of the pan, it holds in the bottom circle and sides of the pan.
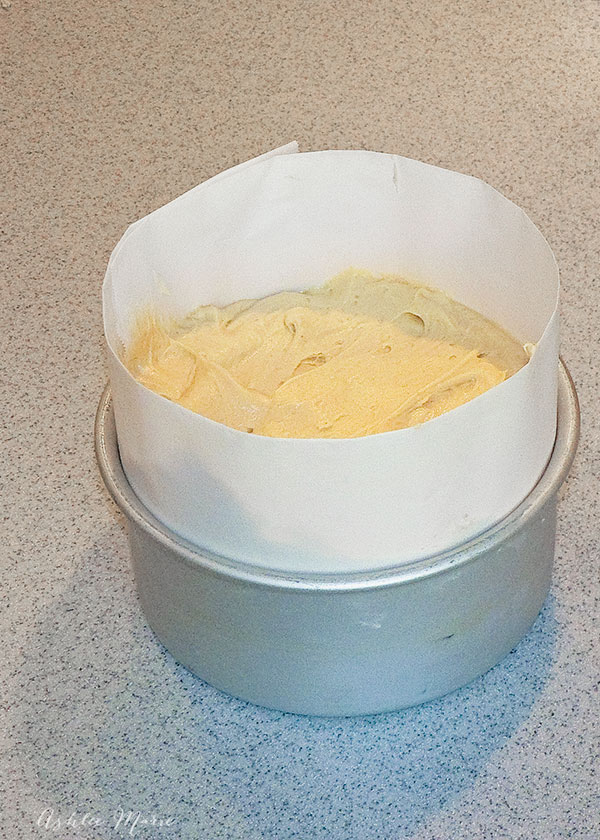
All ready for batter! I like to pour the batter up the sides of the real pan, in this case a 3 inch tall pan. Then as it bakes it rises up taller. It’s nice for the carving I do. But you can also cut off the top and cut it into 2-4 layers, fill it and create an extra tall cake (I like my wedding cake layers to be taller, more elegant).


Kara F.
Thank you so much for this tip! I came across your site trying to find a tutorial on topsy turvy cakes and I loved it! Thanks again! ~ Kara F.
Ashlee
I hope the topsy turvy cake carving is as helpful for you!
SHiloh HAnd
How long do you bake the 6 inch rounds, since there is extra batter?
Ashlee
ummmm thats hard to answer, I live at an EXTREMELY high altitude, so I have to do all sorts of crazy stuff to bake my cakes, so I hate to promise you one thing and have it notwork out. use bake even strips so the outside doesn’t cook too fast, and after the first 45 mins check it , if it’s still goopy add 15 mins, mine take about an hour +, but I also bake at a lower temp with extra liquid because of my altitude issues.
Aura Nielsen
what are bake even strips?
Ashlee
they are fabric strips you soak in cold water and wrap around the pan, it keeps the outside of your pan cooler so your cake cooks more evenly, rather that the outside over cooking while the inside is raw you can see some examples here
Mainyapa
Hi Ashlee
Thank you for your post, but would want to know if the recipe is for a 2 x 9 inch pan, to make the cake tall should I use all the batter into 1 x 9 inch pan
Ashlee Marie
yup! I double or quadruple cake batter recipes to make taller cakes